WishList Member includes a Code Redemption integration. This can be used to generate unique codes, manage those codes and more.
Codes can be redeemed by users for actions like being added to or moved to a Level (or Levels). This allows for a user to join a membership by redeeming a unique code.
Codes can be managed (cancelled, uncancelled, searched, etc.) The codes can also be exported so they can be shared with services like AppSumo.
These are just a few examples. More details are explained below (including a Tutorial Video).
—
Enable Code Redemption Integration
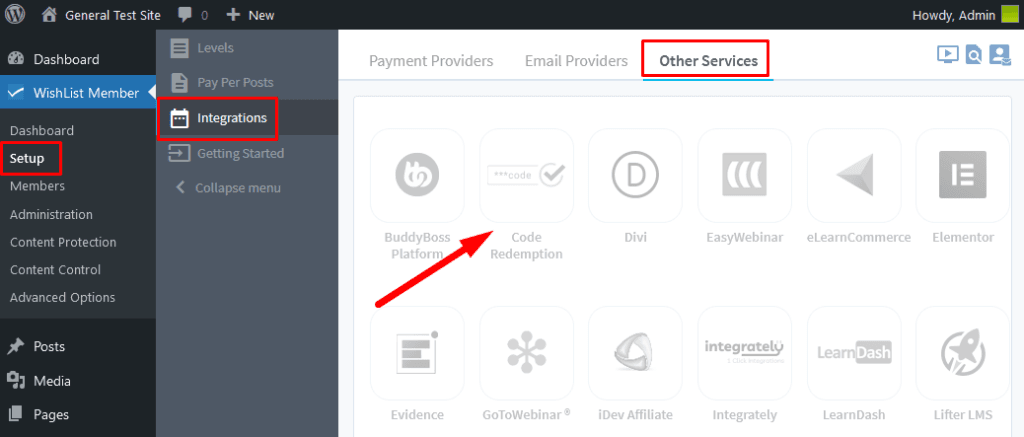
First, you can select and enable the Code Redemption option in the Setup > Integrations > Other Services section of WishList Member.
—
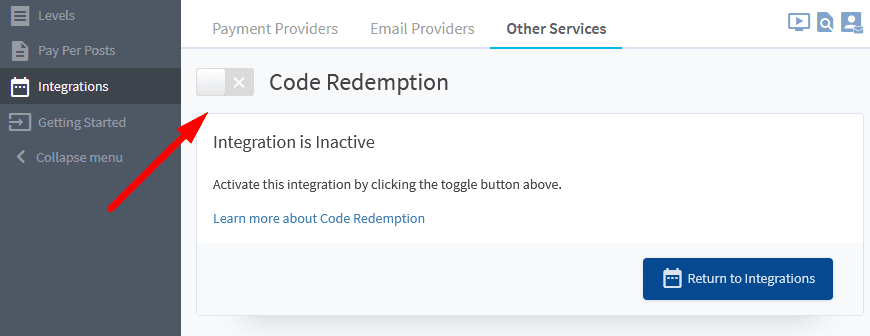
—
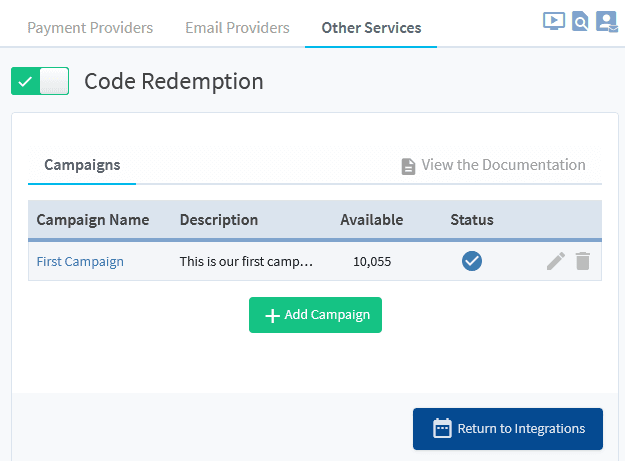
You will now be able to create/edit Campaigns.
—
This is all explained in more detail in the Tutorial Video below. It also walks through the Next Steps in the process of generating Codes and setting up Actions. A Campaign contains the redeemable Codes and the set Actions for those Codes.
Video Tutorial
—
For Reference
Time Stamps for the Video Tutorial above.
0:27 Enabling the Code Redemption Integration.
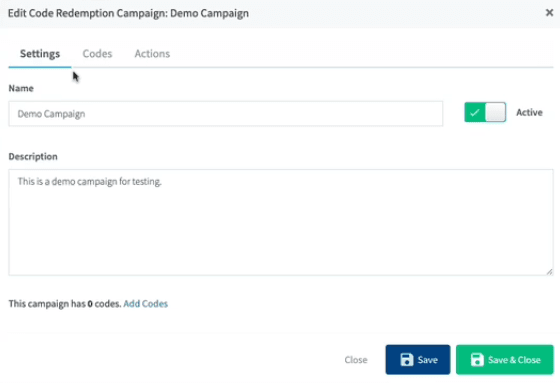
0:42 Add a Campaign. A Campaign is needed in order to create and manage Codes.
—
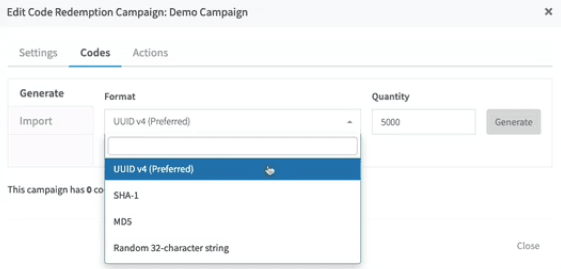
1:13 Generating Codes. You can select the Code Format of your choice. The preferred format is typically UUID v4 so that is recommended if you are unsure which option to select. You can also select the number of Code to be generated.
—
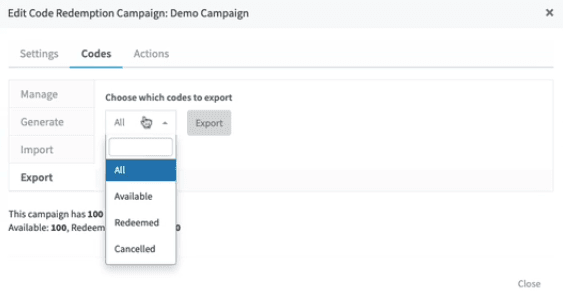
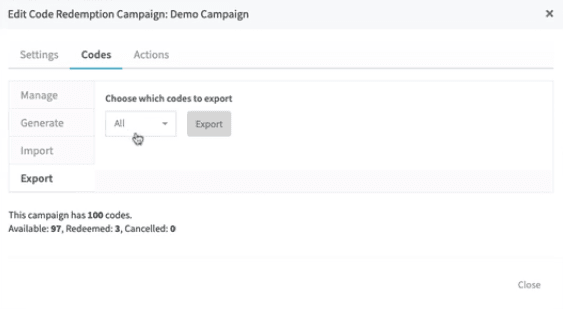
2:20 Exporting Codes. You can select the types of Codes to export (All, Available, Redeemed, Cancelled) and where to place the file on your computer once the Codes are exported.
—
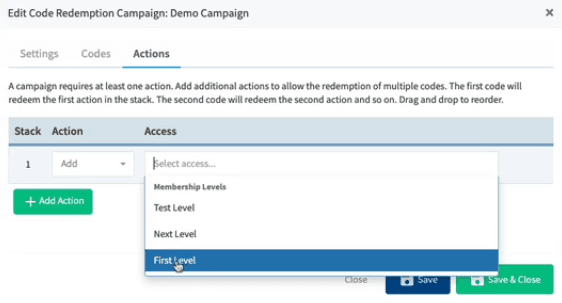
3:48 Creating Actions. You can set what will happen when a User redeems a Code (or redeems multiple Codes). Users can be Added or Moved to Level(s).
—
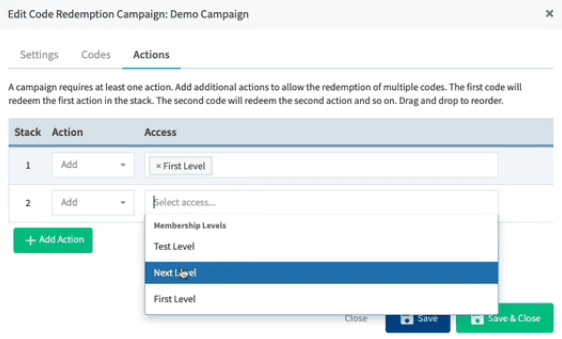
4:35 Stacking Codes. You can set multiple Actions in the Stack (optional). The first Stacked Code can be redeemed by the User first. If a second Stacked Code is available, it can be redeemed by the User second, and so on for any other Stacked Codes. Stack #1 applies the set Action for the selected Level(s), Stack #2 applies the set Action for the selected Level(s), etc.
—
5:03 Redeeming Codes. Once a Campaign is created and Codes have been generated within that Campaign, a method to allow Users to redeem Codes can be set up.
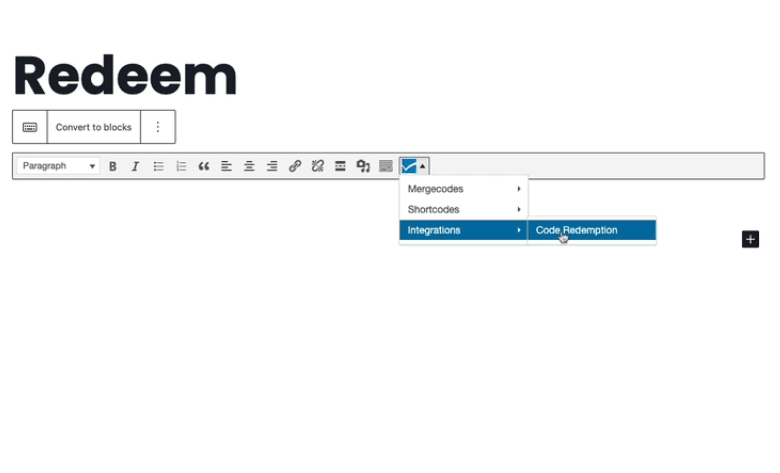
5:14 Creating a Redeem Page. The Code Redemption shortcode can be inserted into any page. This will display the option for Users to redeem their Code on the live version of that page. (This method uses the WishList Member Shortcode Inserter in a Gutenberg Classic Block. The WishList Member Shortcode Creator located on the WishList Member Dashboard can also be used to get that shortcode).
—
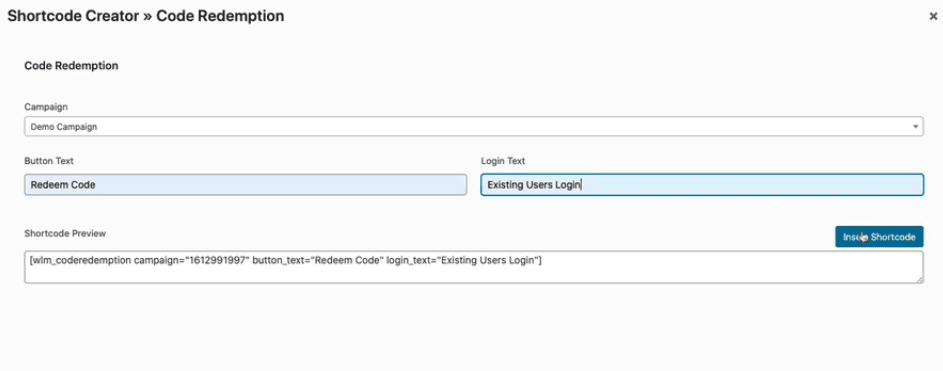
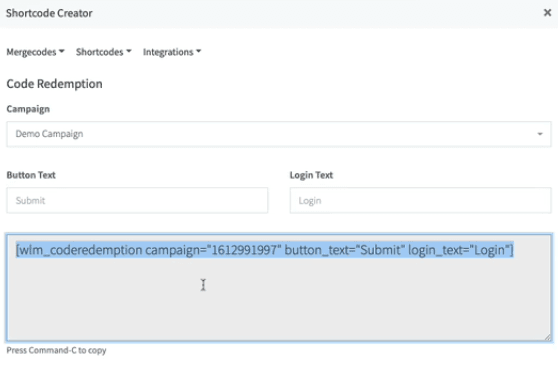
You can set the desired Button Text and Login Text that will appears on the Code Redemption Form.
—
Here is a closer look at a Code Redemption shortcode.
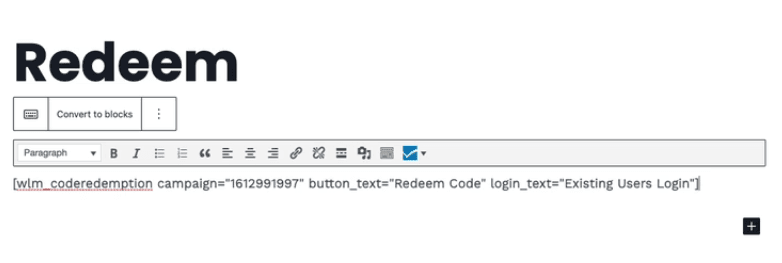
[wlm_coderedemption campaign="1613064828" button_text="Redeem Code" login_text="Existing Users Login"]—
Below is a screenshot of the shortcode inserted into the edit section of a page.
—
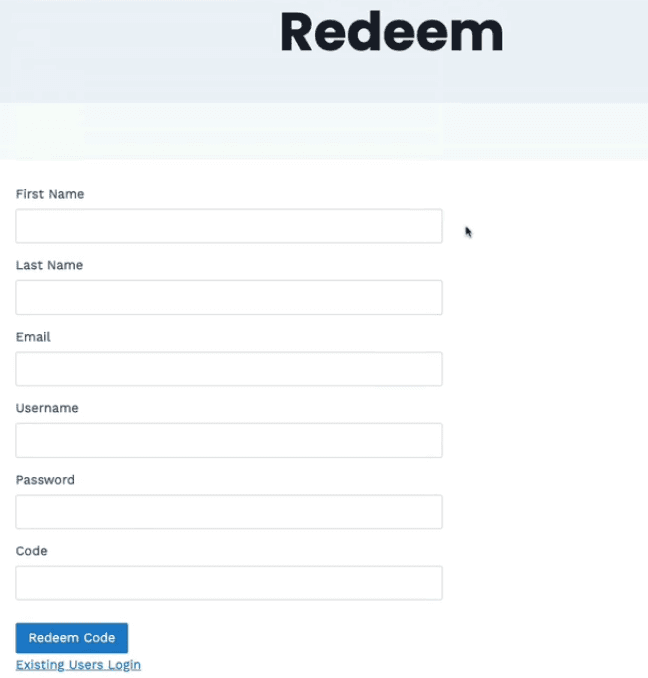
7:04 The Code Redemption Form. You can add any additional text or content to the page. Below is a screenshot of a page using the Code Redemption shortcode.
It displays the fields to register and to enter the Code.
—
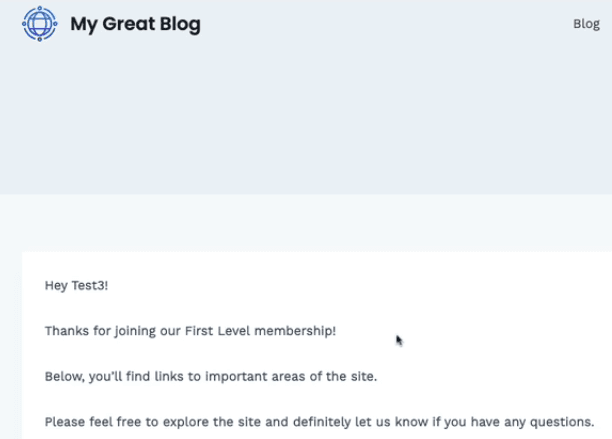
8:37 Successfully Redeeming a Code. After a successful Code Redemption, the User will be registered to the Level and logged into the site. The After Registration page for the Level will be displayed.
—
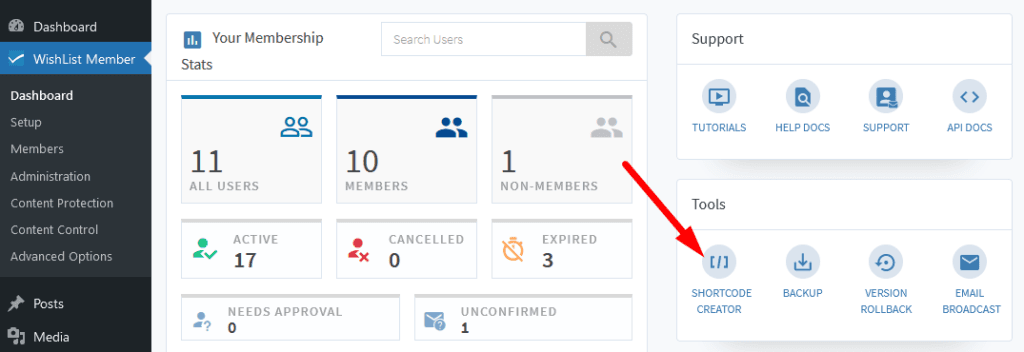
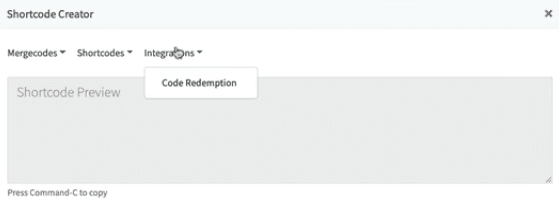
10:01 Using the WishList Member Shortcode Creator to get the Code Redemption shortcode. Located on the WishList Member Dashboard.
—
—
—
10:32 An existing User redeeming a Code. An existing User can simply login when redeeming their Code. No registration required in that case.
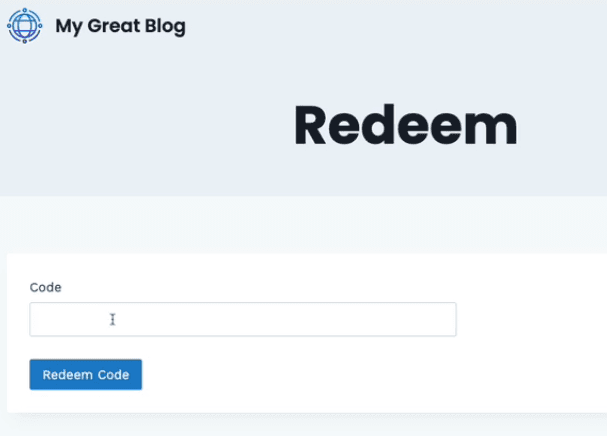
Below is a screenshot of a page using the Code Redemption shortcode and how it appears to a logged in User.
—
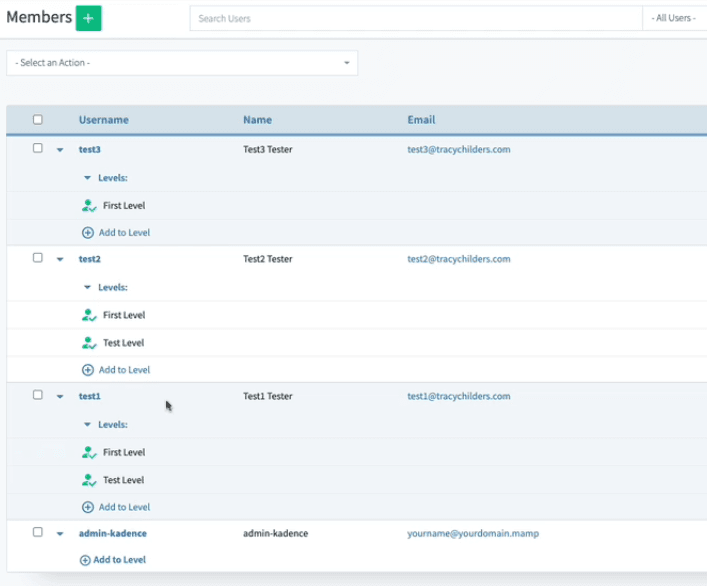
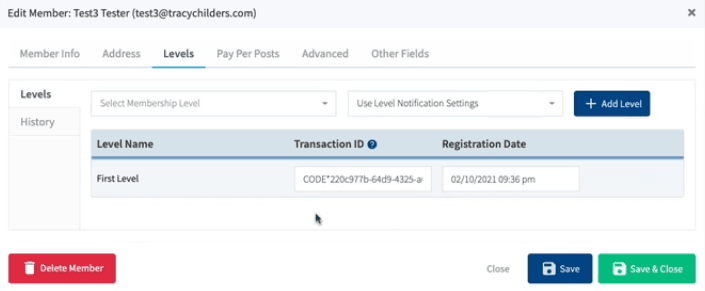
12:35 Summary of a New User and an existing User redeeming Codes. The Transaction ID for the Users will also show the Code they redeemed. The Transaction ID can be viewed in the Member Profile in the Members > Manage section of WishList Member. (Click the Username to view).
—
—
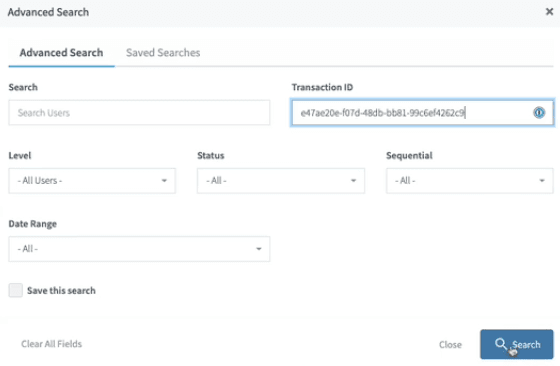
13:58 Search for a User by Transaction ID / Code. The Advanced Search in the Members section of WishList Member can be used to look up a User with the Code they redeemed.
—
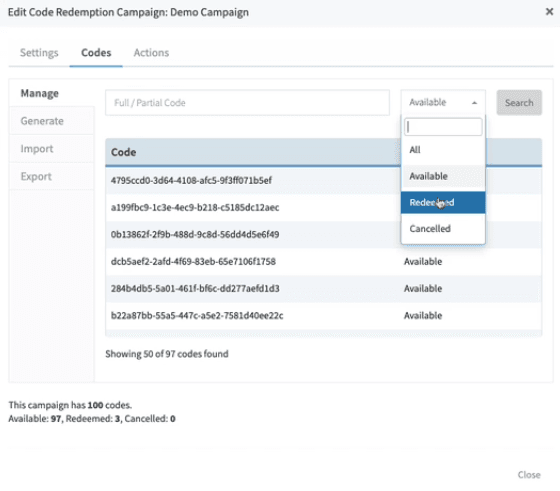
14:44 Search for Codes based on Status. Search results can be sorted by Available, Redeemed, Cancelled, etc. You can also change the status of Code (Cancel, Uncancel, etc.)
—
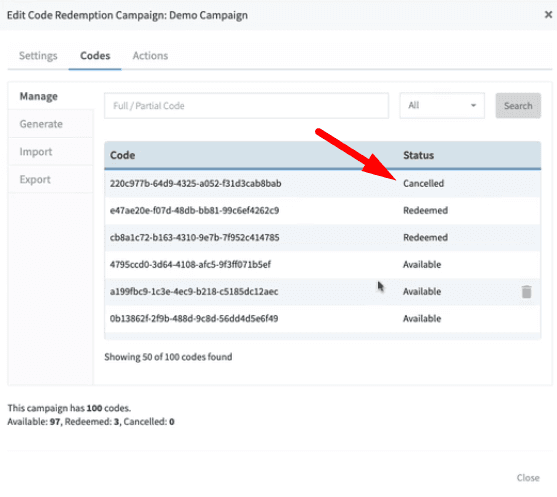
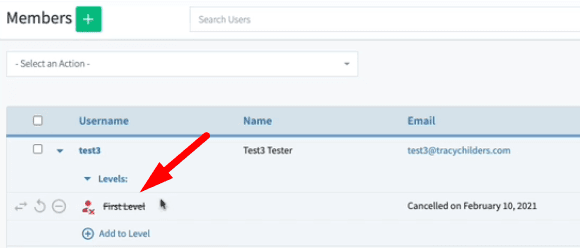
16:22 Cancelling a Redeemed Code which Cancels the corresponding Level for the User. If you cancel a Code that was redeemed by a User, it will also cancel the Level for that User.
—
—
17:07 Exporting Codes. You can export a list of Codes. The file includes the Code Status, etc.
—
