A manual update for the WishList Member plugin can be done in the WordPress Plugins section.
You can delete the WishList Member plugin you have installed and can then upload the new version.
Please Note: All WishList Member settings, members, etc. are stored in the WordPress database so your settings, members would be retained during this process.
That being said, it is highly recommend to create a full and complete WordPress site/database back up before updating in case any unexpected issues occur.
It's a good idea to have a full back up of your WordPress site you can roll back to if you have any issues.
—
Steps to manually update WishList Member:
Create full back up of your WordPress site/database.
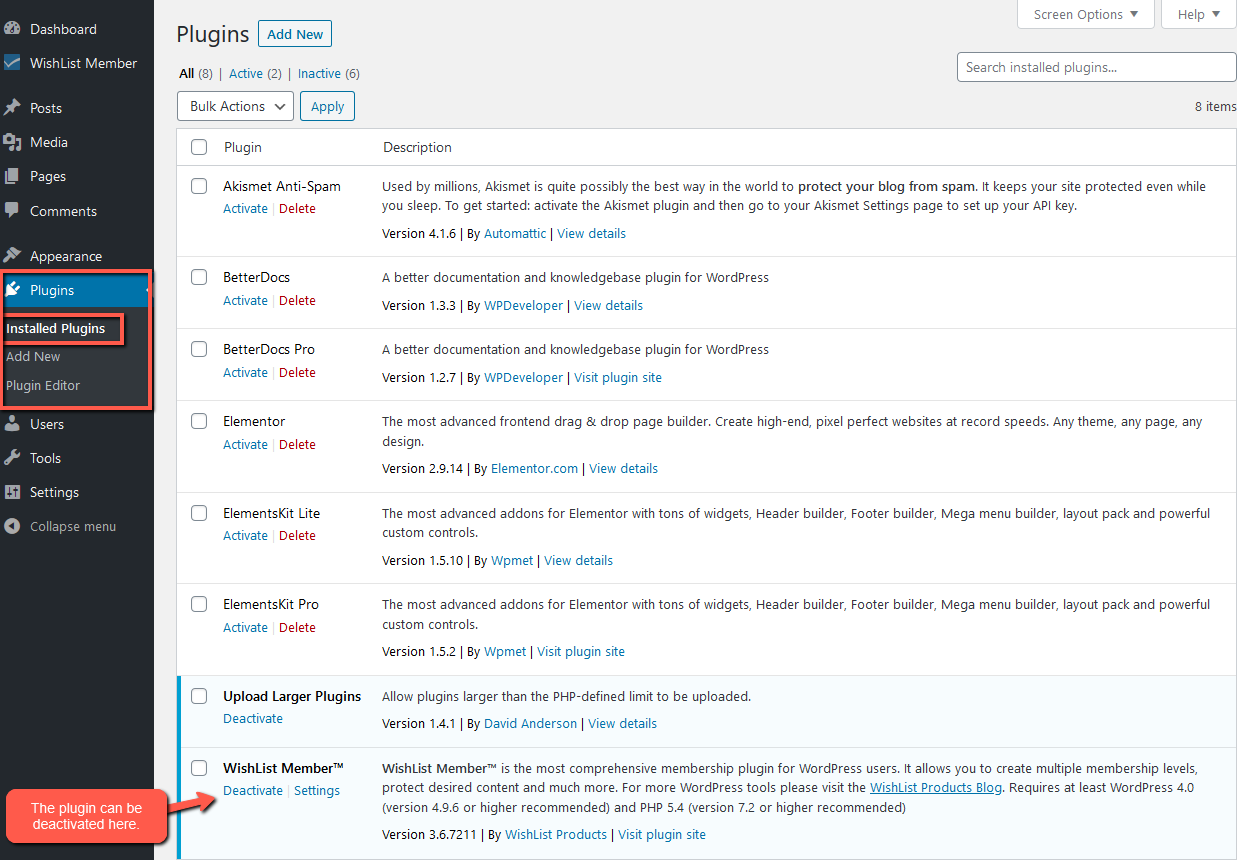
Deactivate the plugin in the WordPress Plugins section
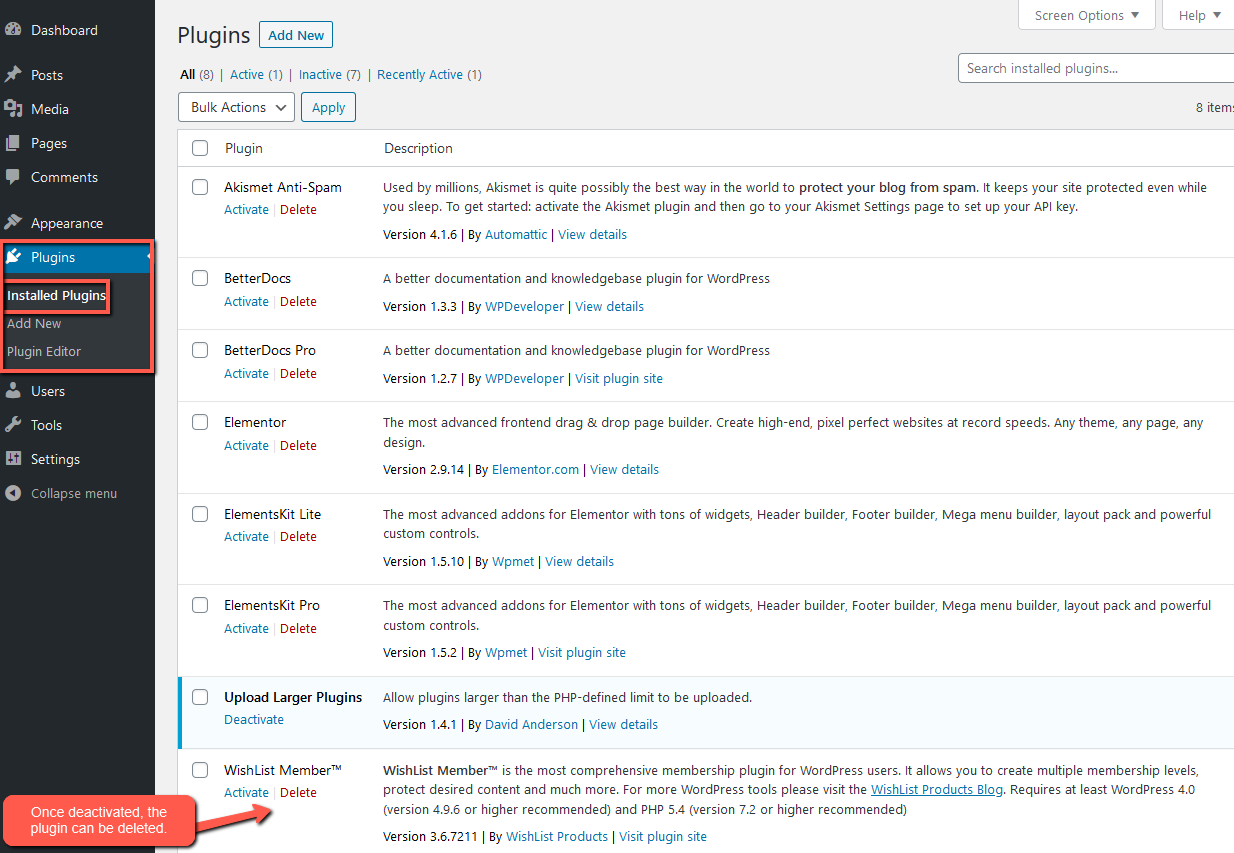
Delete the plugin.
Once you have deactivated and deleted the plugin, you can install the latest version.
Your WishList Member Download link can be found in the Downloads section of the Customer Center. (Must be logged in to access)
That will provide you with a zip file you can upload to in the WordPress Plugins section.
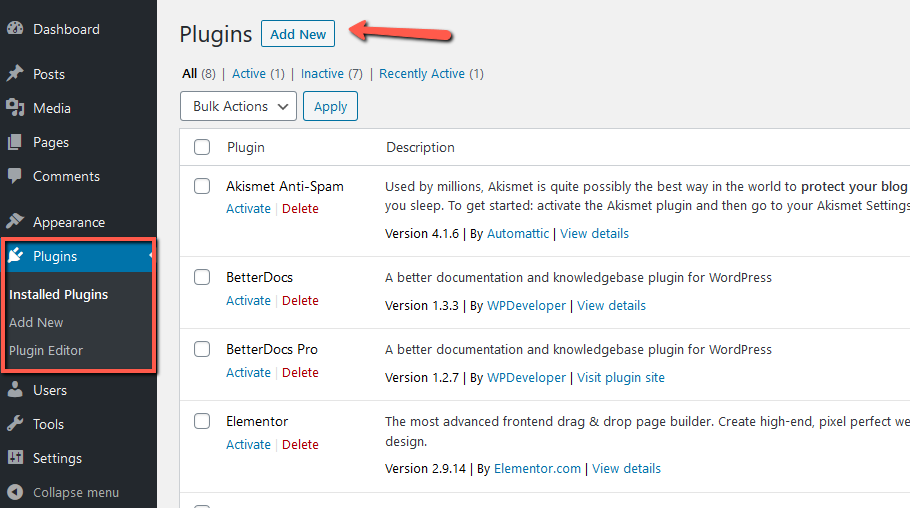
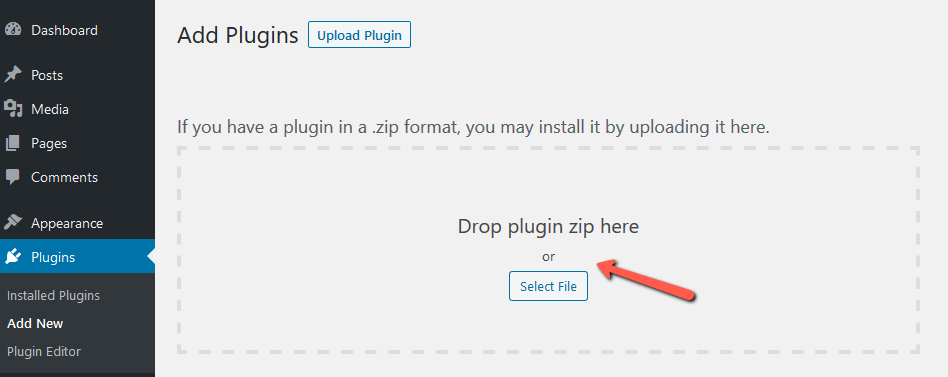
Click Add New button.
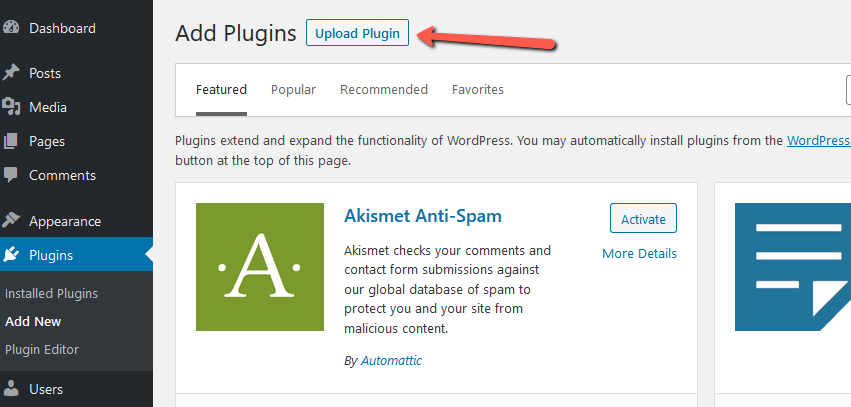
Click Upload Plugin button.
—
Drop in zip file or click Select File from your Computer Files.
Click Activate Plugin button.
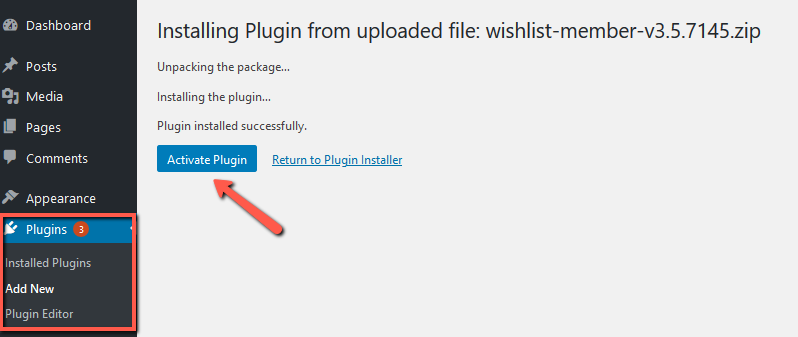 Once you complete these steps, you should be updated to the latest WishList Member.
—
Please Note: Some sites/server environments will have a set limit to the size of plugins that can be uploaded through the WordPress Plugin Upload feature.
If you see an error message regarding the size of the plugin trying to be uploaded, you can use a plugin like Upload Larger Plugins to increase the file upload size for plugins.
This is explained in more detail (including a link to the mentioned Plugin) in the Upload Larger Plugins Knowledge Base article.
